Unityでnend広告を実装 Android編 Unityから実機テスト(非ADT)
Unityでnend広告を実装 iOS - 饂飩コーディング
↑コチラで過去にiOSでの実装に軽くふれましたが、Androidでももちろん簡単に実装できます
手順概要
nendにユーザー登録→広告枠の取得→SpotIDの取得 (ココまで完了しているものとします)
nendからPluginのDownload→実装手順PDFの熟読→UnityProjectへのPackage読み込み→
→GooglePlay関連JARを取り込む→AndroidManifest.xml のコピーと編集→実機でテスト
だいたい上記の感じです
この記事はUnityから実機テストする場合ですので、UnityからAndroid ProjectをExportして
やる方法とは違いますのでご注意ください。
以下順を追ってみます
1、nendのサイトからUnity用Pluginをダウンロードして解凍しておきます。
2、Unityで新規Projectを作成して、Nend PluginをImportします。

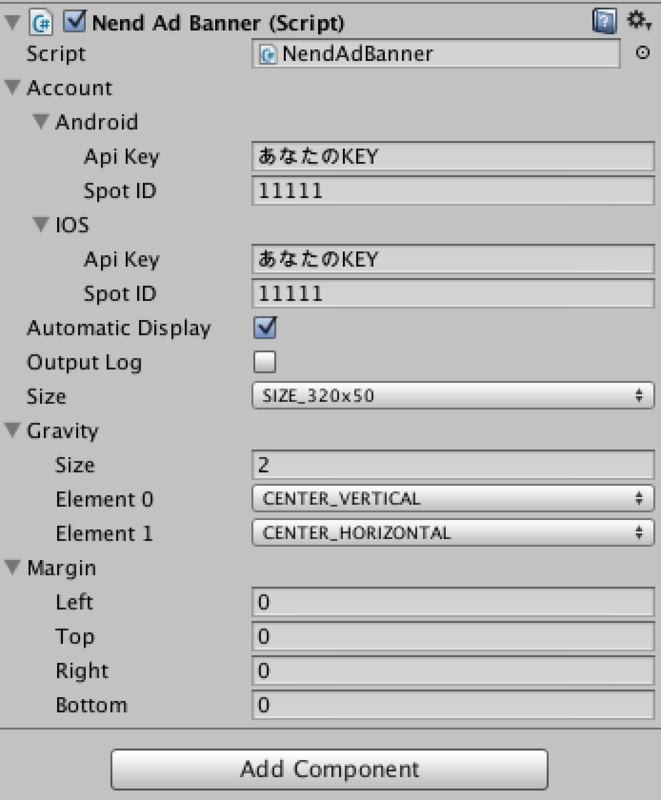
3、GameObjectをCreateしてそこにPluginからNendAdBanner.csをAddCompornentします
追加後はInspecterで広告IDとSpotIDの箇所をAndroid,iOSそれぞれ、nendで広告枠を作ってからそこに記載されている情報を入力します。
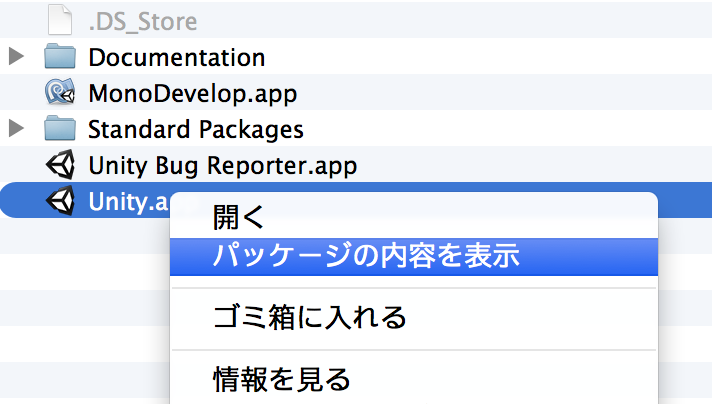
4、OSXの場合のAndroidManifest.xml は/Applications/Unity/Unity.app/Contents/PlaybackEngines/AndroidPlayerからコピーして編集しましょう。こんな感じで開いていけばみつかるはずです。
5、nendのPDFにあるようにmanifest.xmlを変更していきます。
6、Assets/Plugins/Androidフォルダ下にassetsフォルダを作成しそのこPFDの指示にしたがって画像ファイルを配置します。
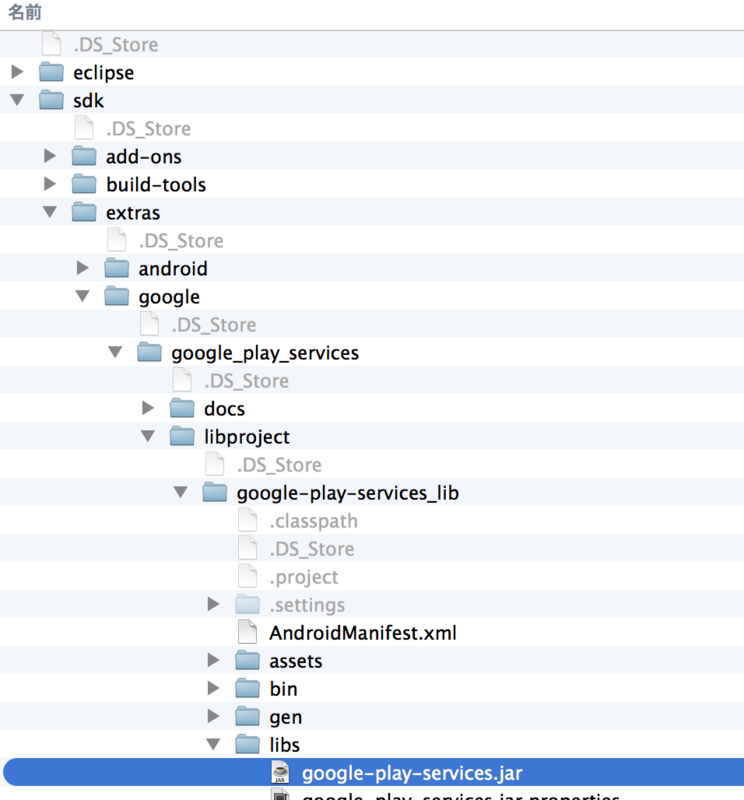
7、Assets/Plugins/Androidフォルダ下におのおのの環境/sdk/extras/google/google_play_services/libproject/google-play-services_libからgoogle-play-services.jarを配置します
8、Assets/Plugins/Androidフォルダ下にresフォルダを作成
9、Assets/Plugins/Android/resフォルダ下にvaluesフォルダを作成
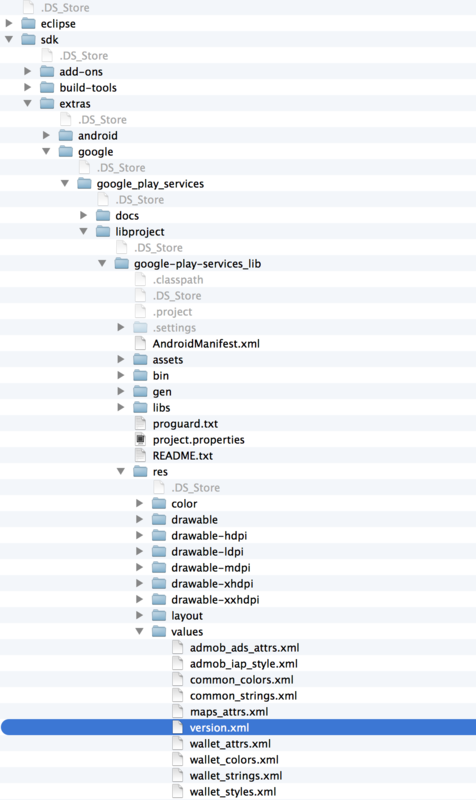
10、9にGoogle Play services ライブラリプロジェクト内にある version.xml を追加
11、UnityのOtherSetting でInternet Access をRequieredにする
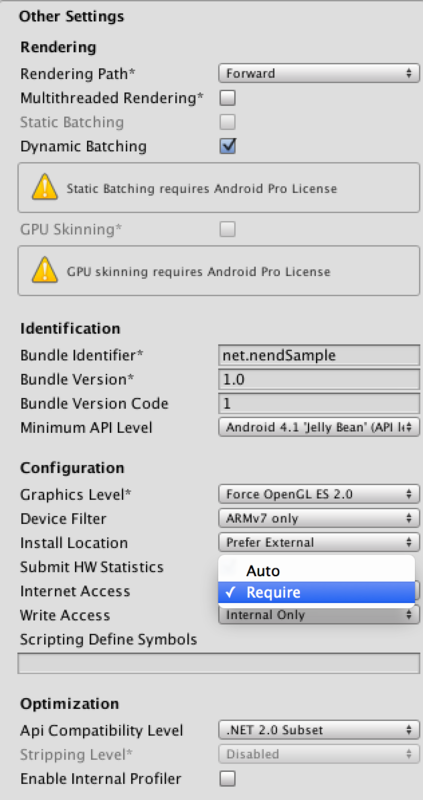
12、実機でテストする(UnityEditter上では確認できないため)
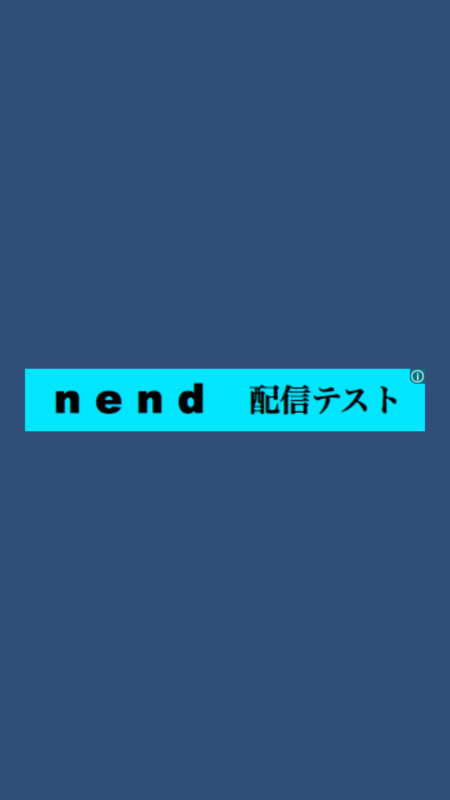
参考AndroidManifest.xml
<?xml version="1.0" encoding="utf-8"?>
<manifest
    xmlns:android="http://schemas.android.com/apk/res/android"
    package="net.nendSample"
	android:installLocation="preferExternal"
	android:theme="@android:style/Theme.NoTitleBar"
    android:versionCode="1"
    android:versionName="1.0">
    <supports-screens
        android:smallScreens="true"
        android:normalScreens="true"
        android:largeScreens="true"
        android:xlargeScreens="true"
        android:anyDensity="true"/>

    <application
		android:icon="@drawable/app_icon"
        android:label="@string/app_name"
        android:debuggable="true">
        <activity android:name="com.unity3d.player.UnityPlayerNativeActivity"
                  android:label="@string/app_name">
            <intent-filter>
                <action android:name="android.intent.action.MAIN" />
                <category android:name="android.intent.category.LAUNCHER" />
            </intent-filter>
            <meta-data android:name="unityplayer.UnityActivity" android:value="true" />
            <meta-data android:name="unityplayer.ForwardNativeEventsToDalvik" android:value="true" />
        </activity>
        <meta-data
	android:name="com.google.android.gms.version" android:value="@integer/google_play_services_version" />
        <uses-permission android:name="android.permission.INTERNET" />
    </application>
    <uses-sdk android:minSdkVersion="9" android:targetSdkVersion="20" />
  	<uses-feature android:glEsVersion="0x00020000" />
</manifest>
2014/09/04追記
uses-permission android:name="android.permission.INTERNET"
はapplicationの外がいいかもです。
UnityでJsonデータをあつかう
手順概要
I、MiniJsonダウンロード→Pluginフォルダーに取り込む
II、処理スクリプトの記述(Using,Json要求、Json受け取り、Unityでの表示)
だいたいこんな感じです、今回はサーバ側は数年前に稼働していた(現在休止中)のレンタルサーバ上
にあるMysql+PHPで構築されたサーバ側のシステムを利用します。(URLは伏せます)
1、それでは、まずはMiniJsonをダウンロードしましょう。DownLoad Gistボタンをおす
Unity3D: MiniJSON Decodes and encodes simple JSON strings. Not intended for use with massive JSON strings, probably < 32k preferred. Handy for parsing JSON from inside Unity3d.
解凍したMiniJSON.cs.csをUnity側で「Plugins」フォルダーを作成しそこに取り込んでおきましょう。
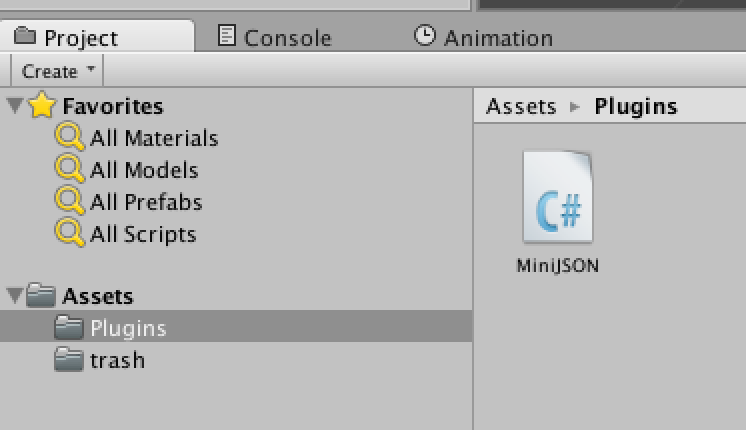
2、using にSystem.Collections.Generic、MiniJSONを追加します
using UnityEngine;
using System.Collections;
using System.Collections.Generic;
using MiniJSON;
コールーチンでJson処理部分を呼び出します
wwwFormを作ってAddFieldしてphp側に渡すパラメータを設定します
ここではphp側でgiveMeThisIDInfoと記述してあるパラメーターにTest2.idParamaterをセットしています。あとはwwwでphpのURLとFormにセットしたFieldを投げると結果が帰ってきます。
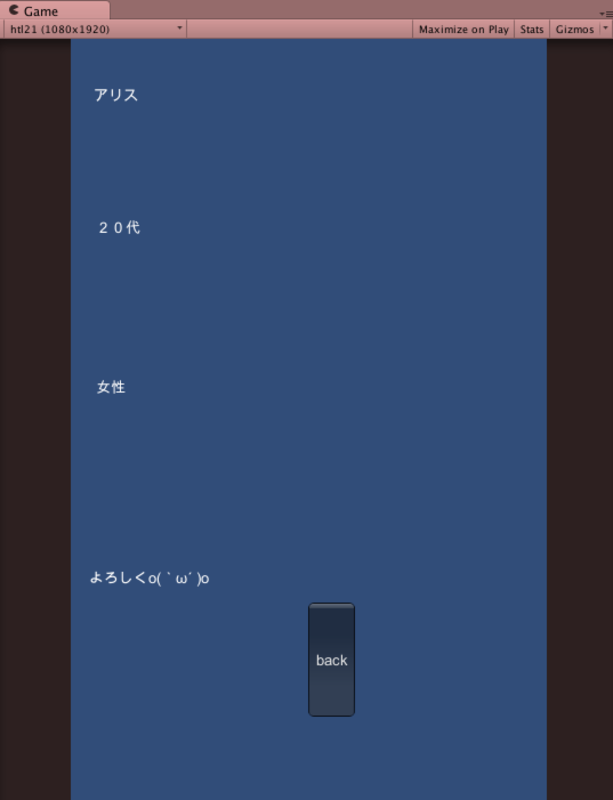
帰ってきたら、Jsonでパースし各の要素をForEachで抜き出してguigui11〜guigui44のGuiTextにセットするだけです。
void Start () {
		StartCoroutine("GetJSON");
	}
IEnumerator GetJSON(){
		WWWForm wwwForm = new WWWForm ();
		wwwForm.AddField("giveMeThisIDInfo" , test2.idParamater);
		//
		WWW www = new WWW("http://yahhoo.com/getUserDataById2.php",wwwForm);
		yield return www;
		//  error
		if(!string.IsNullOrEmpty(www.error)){
			Debug.LogError(string.Format("Error  ", www.error));
			yield break;
		}
		Debug.Log ("Recive Data = " + www.text);
		//
		string json = www.text;
		// Json Parse
		IList zentai = (IList)Json.Deserialize(json);

		foreach(IDictionary youso in zentai){
			//string name = (string)person["name"];
			string name = (string)youso["Read_Name"];
			guigui11.text=name;

			string nendai = (string)youso["Read_Nendai"];
			guigui22.text=nendai;

			string danzyo = (string)youso["Read_danzyo"];
			guigui33.text=danzyo;

			string comment = (string)youso["Read_Comment"];
			guigui44.text=comment;

		}
	}
phpでの処理部分はこんな感じ
function create() {

			if (isset($_POST["giveMeThisIDInfo"])){
			// Put parameters into local variables
           $uketoriID = $_POST["giveMeThisIDInfo"];

            $stmt = $this->db->prepare('SELECT SQL statement');
            $stmt->bind_param("i",$p1);

       		$p1=$uketoriID;


            $stmt->execute();
               // Return unlock code, encoded with JSON
            $stmt->bind_result($Name,$Nendai,$danzyo,$chiiki,$hobby,$Comment);

			$result = array();
			while ($stmt->fetch()){
			$result[] = array(
			'Read_Name'=> $Name
			,'Read_Nendai'=> $Nendai
    		,'Read_danzyo' => $danzyo
    		,'Read_chiiki' => $chiiki
    		, 'Read_hobby' => $hobby
    		, 'Read_Comment' => $Comment
			);
        	}
		  	sendResponse(200, json_encode($result));
			$stmt->close();

            }

            //return true;

        // }
		}
結果はこんな感じ
TexturePackerを使ってみようかと検討中
http://www.codeandweb.com/texturepacker
↑ここにあるよ
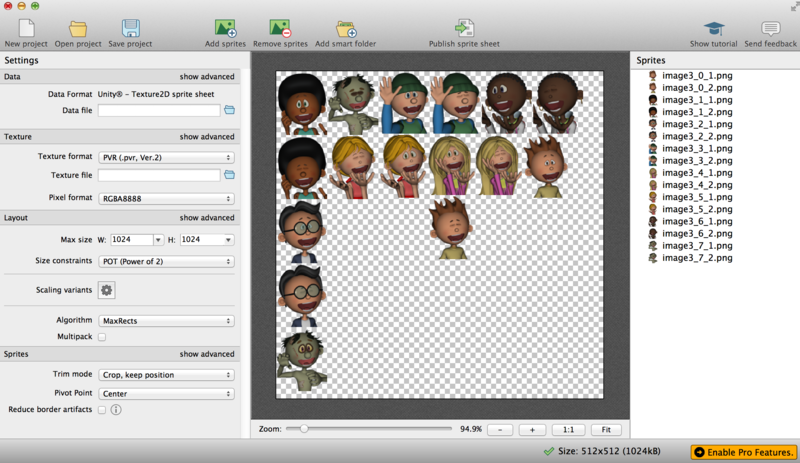
Cocos2dで開発していた時は、古いバージョンのライセンス購入して使ってたんだけど
MacOSXのバージョンを上げていったらいつの頃からか使えなくなってたんで
とりあえず試用版でお試し中。
使い方はSpritesを選択してドラッグするだけ。簡単にAtlasに配置してくれます。
xCodeで使う場合はPlistも吐き出してくれるので便利!
Free Licenseもらえたら、Unityでの使い方を記事にする予定です
blenderでボーンを入れてアニメーションしてみよう
おそらく、通常は以下の手順
1、人体モデリングする
2、ボーンを入れる
3、Weight調整する
4、アニメーションを入れる
5、レンダリング
今回は、モデルはダウンロードしてきた物を使い、アニメーションもフリーのデータをつかいます。
ボーン周りの勉強にはなるかとおもわれます
モーションデータはこの辺りから使わせていただきます
https://sites.google.com/a/cgspeed.com/cgspeed/motion-capture
モデルデータはCC0辺りで適当な物で
事前にUserPrefarenceからBVH Importerを追加しておきましょう

それでは今回の手順
1、BVHファイルをBlenderにImportする
2、Amateur、Waightの調整
はいこれだけですが、Waight調整がめんどくさいかもです
はじめます
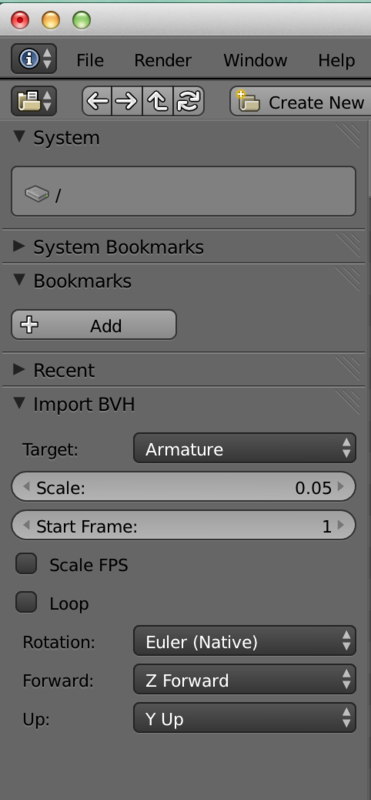
1、BVHファイルをImportする Scaleは0.5くらい、Z Forwardでとりこみます
2、大まかにAmateurの大きさを調整しておく
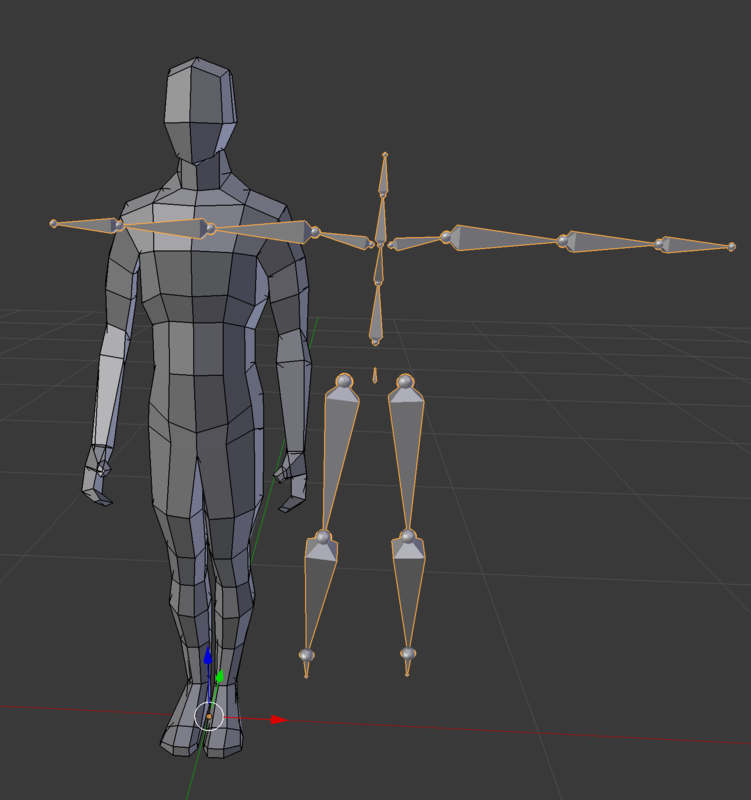
3、boneをモデルにそって再配置していきます
X-rayにチェックをいれておくとやりやすいです
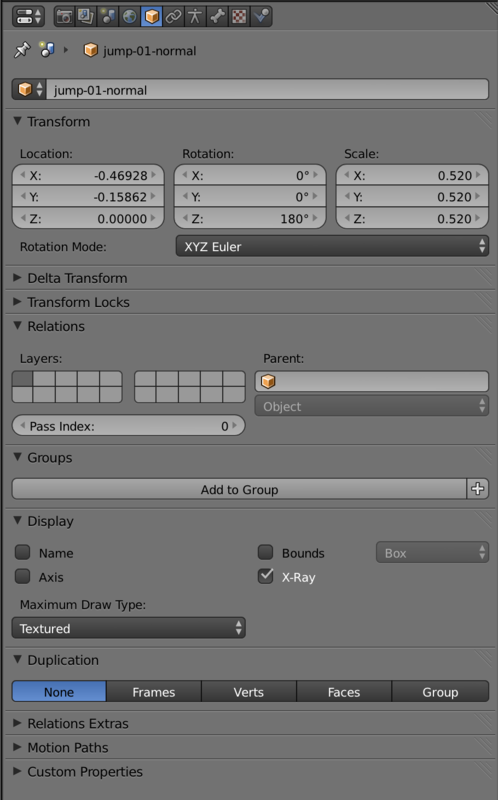
4、ObjectModeで3でだいたい重なる様にしておいて、
かならずモデルを選択後にShit+ボーンを選択してその後にCTRL+PでParent設定します
まずはArmatureDeformを選択
5、EditModeでさらに細かくBoneをモデルに近づけていきます
6、今度は、Objectモードで再度Ctrl+PでWith Automatic Weightを選択します
すると、自動でWeight設定とBoneに名前をつけてくれます。
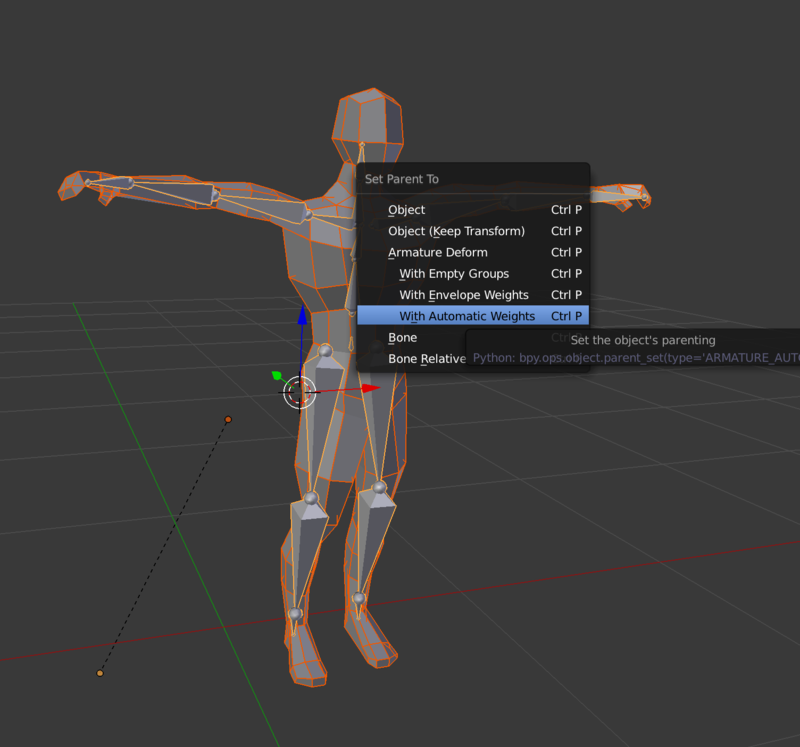
7、ここでアニメーションを再生して、8以降でWeight調整します
8、EdtiModeで首のボーンを選択し、そのままObjectModeに移行します。それからいったんモデルを右クリックするとWeightModeに移ることができるので、首のWeightを調整することができます。

9、プロパティーを見れば分かるんですが、VertexGroup からボーンを選択する事もできるので
便利だったらそっちを使って下さい。
10、weightはプラスのときはMixかAdd, 消したい時はSubstructを選択して書き込んで下さい
以上で設定終了です
上記の作ったBlender設定を保存してUnityに取り込めばアニメーションすることができます
結果はこちら↓
http://nrtkb.sakura.ne.jp/forblog/unityFolder/jumpWeb.html
OSX Logicool M555bでマウス中央クリックを設定する
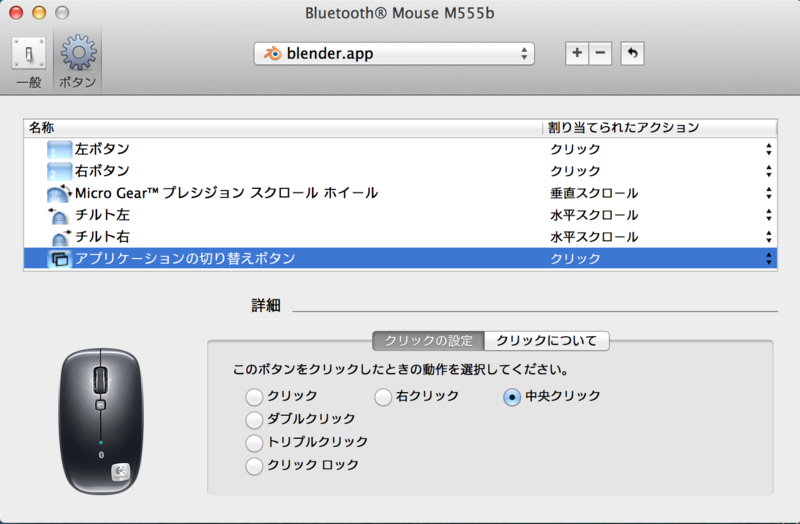
てっきりこのマウスでは中央ボタンクリックはできないと思ってたんだけど
設定変えたらできた。
アプリケーション切り替えボタンをクリックに変更してから
クリックの挙動を中央クリックに変更すればOK
うぅーん、早く気がつけばよかったw
Unity→Xcodeでadmob実装してみる。とりあえず表示するだけバージョン
久しぶりにadmob実装してみます。今回はUnityでbuildしてXcodeで実装してみます。
Pluginは使わないので簡単だけどただ表示するだけです。
Unityのバージョンによってもどのファイルに実装すればいいのか変わってくるみたい
今回はUnity4.5.1こいつでいきます。
https://developers.google.com/mobile-ads-sdk/download?hl=ja
↑GoogleのDeveloperサイトからiOS用のSDKをダウンロードします
Unityで簡単なプロジェクトを作って、iOS用にBuildします
ここではiOSBuildという名前でBuildしていわゆるXcode用のソースをUnityから吐き出します。
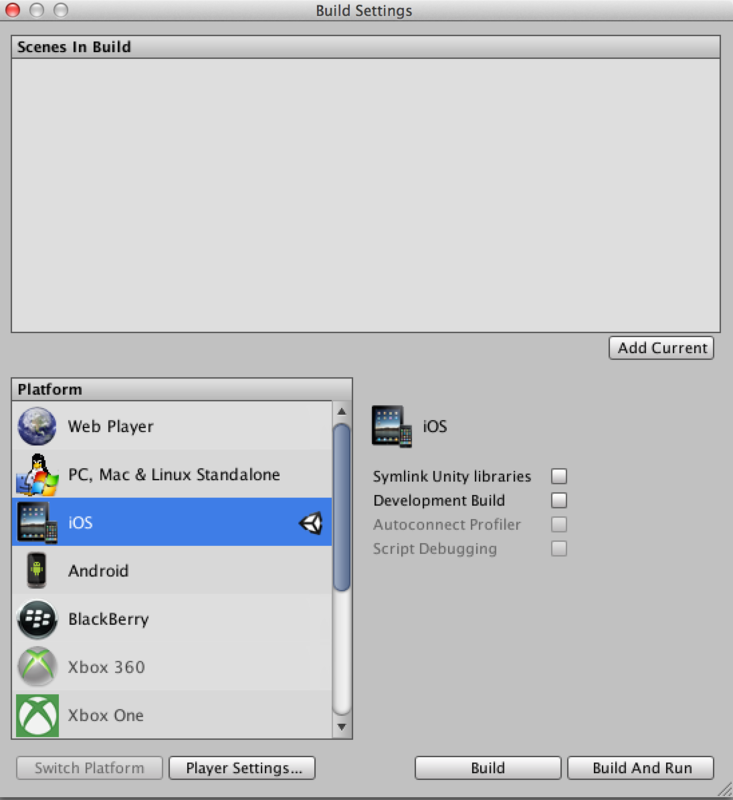
ここからはXcodeで作業します。projectファイルをダブルクリックして
https://developers.google.com/mobile-ads-sdk/docs/?hl=ja#ios
の手順にしたがってadmobファイルとFrameworkを追加していきます。
まずは、add-ons以外をxcodeに取り込みます。

以下のフレームワークを取り込みます
AdSupport
AudioToolbox
AVFoundation
CoreGraphics
MessageUI
StoreKit
SystemConfiguration
CoreTelephony
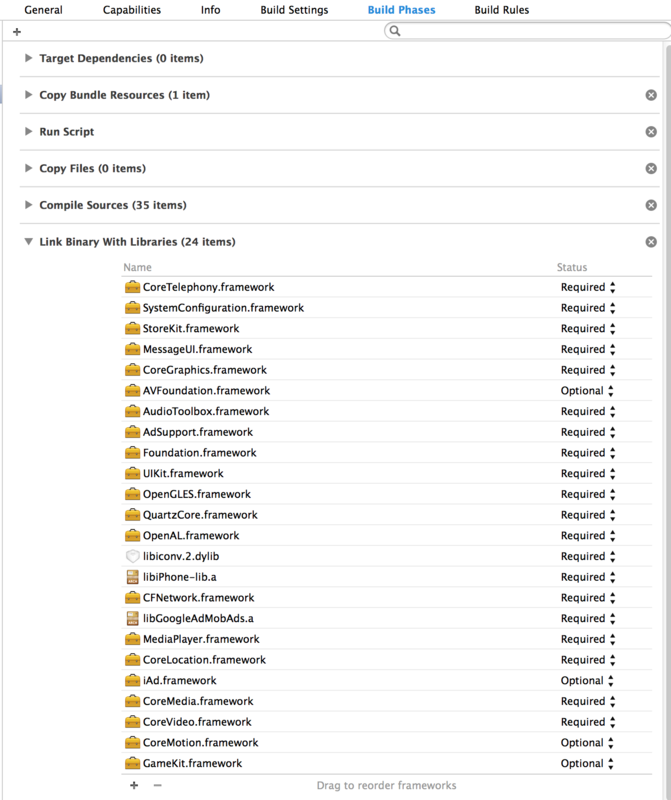
GoogleのDocumentにはなぜか漏れているんだけど忘れずにCoreTelephony.frameworkも
追加します。自分はこれ入れてなくてエラーの文字読んでたら必要なんじゃない?って気づきました
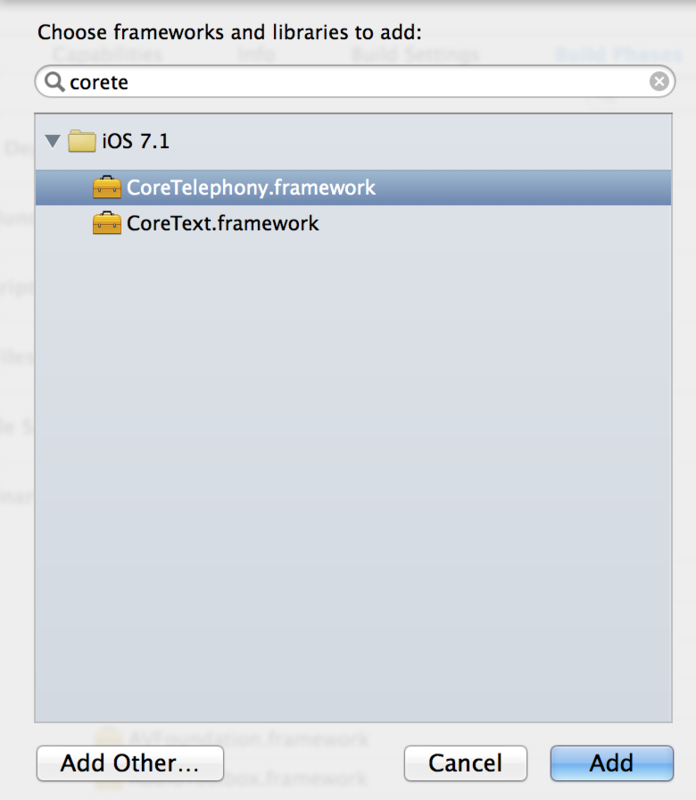
次は、Build Settings のLinkingのOther Linker Flagに"-ObjC"を追加
とりあえずココで一度デバッグ実行してみるとエラーがでてくることがあります

これはLibrariesへのSearch Pathが正しく設定されていないっぽいのが原因なので
Librarie Search Path を設定しなおします。
↓こんな感じ

libiPhone-libのディレクトリをFinderで調べてLibrary Search Path の所に追加して
もう一つlibGoogleAdMobAdsのディレクトリも追加してあげればOKでしょう
ここまでデバッグ実行して警告がでなければOK
ここからコーディングします
UnityAppController.mmを探してこれを変更していきます
基本はGoogleの導入手順書にそって変更していきますが全く同じではないです
UnityAppController+ViewHandling.mmに
#import "GADBannerView.h"を追加
さらに-(void)createViewHierarchyメソッドを書き換えます
- (void)createViewHierarchy
{
/////////////////
    GADBannerView* _adBanner;
/////////////////

	AddViewControllerAllDefaultImpl([UnityDefaultViewController class]);

	NSAssert(_unityView != nil, @"_unityView should be inited at this point");
	NSAssert(_window != nil, @"_window should be inited at this point");

	[self createViewHierarchyImpl];
	NSAssert(_rootView != nil, @"createViewHierarchyImpl must assign _rootView");
	NSAssert(_rootController != nil, @"createViewHierarchyImpl must assign _rootController");

	_rootView.contentScaleFactor = [UIScreen mainScreen].scale;
	_rootView.autoresizingMask = UIViewAutoresizingFlexibleWidth | UIViewAutoresizingFlexibleHeight;

	_rootController.wantsFullScreenLayout = TRUE;
	_rootController.view = _rootView;
	if([_rootController isKindOfClass: [UnityViewControllerBase class]])
		[(UnityViewControllerBase*)_rootController assignUnityView:_unityView];

	//[_window makeKeyAndVisible];
	[UIView setAnimationsEnabled:NO];

	// TODO: extract it?

	ShowSplashScreen(_window);

	NSNumber* style = [[[NSBundle mainBundle] infoDictionary] objectForKey:@"Unity_LoadingActivityIndicatorStyle"];
	ShowActivityIndicator([SplashScreen Instance], style ? [style intValue] : -1 );


/////////////////
    CGPoint origin = CGPointMake(0.0, 0.0);
    _adBanner = [[[GADBannerView alloc] initWithAdSize:kGADAdSizeBanner origin:origin] autorelease];
    _adBanner.adUnitID = @"あなたのPublisher ID";
    [_adBanner setRootViewController:_rootController];
    [_mainDisplay->view addSubview:_adBanner];


     GADRequest *request = [GADRequest request];
    request.testDevices = [NSArray arrayWithObjects:
                           GAD_SIMULATOR_ID,
                           @"テスト用端末のUDID",
                           nil];

    [_adBanner loadRequest:request];

    //[_mainDisplay->window makeKeyAndVisible];
    [_window makeKeyAndVisible];
/////////////////

}
広告の位置設定はadBanner.centerをCGPointMakeか何かで設定すればOKかとおもわれます
こんな感じになります
https://www.youtube.com/watch?v=j1PgFzo88hA&feature=youtu.be
